As an Amazon Associate, I earn from qualifying purchases.
Unlocking the Secrets: A Step-by-Step Guide on How to Open Your Ninja Blender Top
Welcome to our comprehensive guide to understanding the unique design and features of the Ninja Blender. Whether you’re a culinary enthusiast or simply looking to upgrade your kitchen appliances, the Ninja Blender is a versatile and powerful tool that can revolutionize your blending experience.
One of the standout features of the Ninja Blender is its innovative blender top design. Unlike traditional blenders, which often require twisting or turning to unlock, the Ninja Blender’s blender top effortlessly locks into place with a simple push and twist motion. This ensures a secure fit, preventing any accidental spills or leaks during operation.
Additionally, the blender lid of the Ninja Blender is designed with convenience in mind. It features a tight seal that prevents any splatters or messes while blending. The lid also incorporates a built-in pouring spout, allowing you to easily pour out your blended creations without having to remove the entire lid.
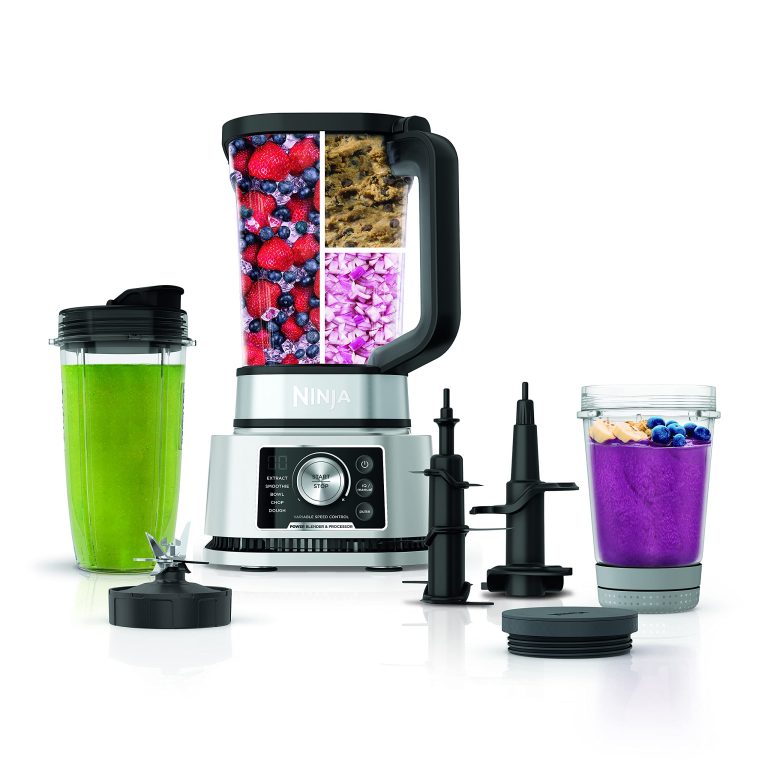
Beyond its unique design elements, the Ninja Blender boasts an array of impressive features that set it apart from other blenders on the market. From powerful motor capabilities to multiple speed settings and pre-programmed functions, this blender offers versatility and precision for all your blending needs.

In this guide, we will delve deeper into these features and explore how they can enhance your blending experience. Whether you’re looking to create smoothies, soups, sauces, or even homemade nut butters – the Ninja Blender has got you covered.
So let’s unlock the potential of this remarkable kitchen appliance and discover why it has become a favorite among both amateur cooks and professional chefs alike!
Step 1: Safety First – Power Off and Unplug Your Ninja Blender
When it comes to using your Ninja Blender, safety should always be your top priority. Before performing any maintenance or cleaning tasks, it is crucial to follow the necessary steps to ensure a safe working environment.
To begin, make sure that the blender is turned off by pressing the power button to shut it down. This will prevent any accidental activation of the blades while you are handling or cleaning the blender.
Next, locate the power cord and unplug it from the electrical outlet. This step is essential as it eliminates any risk of electric shock or injury caused by accidental contact with live electrical components.
By powering off and unplugging your Ninja Blender, you are taking proactive measures to ensure your safety and prevent any potential accidents. Remember, a few extra seconds spent on these precautionary steps can go a long way in protecting yourself and others around you.
Step 2: Identifying the Locking Mechanism of Your Ninja Blender Top
When it comes to using your Ninja blender, understanding the locking mechanism is crucial to ensure a seamless blending experience. The locking mechanism is designed to securely attach the blender top to the base, preventing any accidents or spills during operation.
To identify and unlock the mechanism of your Ninja blender top, follow these steps:
1. Examine the top of your blender pitcher and locate the handle or knob. This is usually located towards one side of the lid.
2. Look for any arrows or symbols on both the lid and pitcher base. These indicators will guide you in aligning and locking the two components together.
3. Align the handle or knob on the lid with the corresponding slot or groove on top of the pitcher base. Make sure they are perfectly aligned before proceeding.
4. Once aligned, firmly press down on the handle or knob while simultaneously turning it in a clockwise direction. You may hear a clicking sound as it locks into place.
5. To unlock, simply reverse this process by pressing down on the handle or knob while turning it counterclockwise until it releases from its locked position.
Remember that each Ninja blender model may have slight variations in their locking mechanisms, so refer to your user manual for specific instructions if needed.
Step 3: Applying the Correct Technique to Release the Locking Tabs or Latches
Releasing the locking tabs or latches on your Ninja blender top requires the correct technique to ensure a smooth and effortless process. By following these steps, you’ll be able to unlock your blender top with ease and continue preparing delicious smoothies and recipes in no time.
1. Identify the locking tabs or latches: Take a close look at your Ninja blender top and locate the locking tabs or latches. These are usually located on opposite sides of the blender top and are designed to secure it in place during operation.
2. Assess the type of locking mechanism: Depending on the model of your Ninja blender, there may be different types of locking mechanisms. Common ones include push-button locks, slide locks, or twist locks. Understanding which type you have will help you apply the correct technique for releasing them.
3. Push-button lock technique: If your Ninja blender top has push-button locks, simply press down on each button simultaneously while gently lifting up on the lid. This action will disengage the locking mechanism, allowing you to release it easily.
4. Slide lock technique: For blenders with slide locks, locate the small tab near each lock and slide it inwards towards the center of the blender lid while lifting up on it at the same time. This motion will release both locks simultaneously, freeing up your blender top.
5. Twist lock technique: In cases where your Ninja blender top utilizes twist locks, carefully grip both sides of the lid and rotate it counterclockwise until it unlocks from its base. Once unlocked, lift up gently to remove it completely.
Remember to handle these actions with care and avoid using excessive force that could potentially damage your Ninja blender or its components.
By applying these techniques correctly, you can effortlessly release the locking tabs or latches on your Ninja blender top without any hassle or frustration.
Step 4: Gentle Twists and Turns – Opening the Ninja Blender Top with Care
Mastering the art of opening a Ninja Blender top with finesse is essential for any blender enthusiast. In this step, we will delve into the technique of gently twisting and turning the lid open, ensuring a seamless and hassle-free blending experience.
The Ninja Blender’s innovative design requires a unique approach to opening its top. By employing a combination of precision and patience, you can effortlessly access the inner workings of your blender without any mishaps or spills.
To begin, firmly grasp the lid’s handle with one hand while securely holding the base of the blender with your other hand. This ensures stability and prevents any accidental movement during the opening process.
Next, apply gentle pressure to the lid as you start to twist it counterclockwise. The key here is to maintain a steady grip while gradually loosening the lid. Avoid exerting excessive force or rushing through this step, as it may lead to damage or difficulty in reassembling later on.
As you continue twisting, you may encounter slight resistance due to the tight seal created by Ninja Blender’s advanced technology. Don’t fret! This is perfectly normal and indicates that your ingredients are being blended securely within.
Once you feel that the lid has been adequately loosened, carefully lift it upwards while still maintaining control over both hands. Take note not to tilt or tilt excessively during this process to prevent any spills or accidents.
Congratulations! You have successfully mastered the technique of gently twisting and turning open your Ninja Blender top. Now you can confidently embark on your blending adventures with ease and peace of mind.
Remember, practice makes perfect when it comes to mastering this skill. With time, opening your Ninja Blender will become second nature, allowing you to effortlessly create delicious smoothies, soups, and more without any hassle or frustration.
Step 5: Enjoying a Smooth Blend – Properly Closing and Securing the Ninja Blender Top Again
Closing and securing the top of your Ninja Blender properly is crucial to ensure a smooth blending experience. After all, you wouldn’t want any unexpected spills or accidents while preparing your favorite recipes.
Make sure that the blender jar is securely placed on the base. This will provide a stable foundation for the closing process. Next, align the arrows on both the lid and handle of the blender jar. This ensures that you are positioning the lid correctly.
Once aligned, gently place the lid on top of the blender jar and press it down firmly until you hear a satisfying click or snap. This indicates that it is securely closed. Take a moment to double-check if all sides of the lid are properly aligned with the jar.
To further secure the Ninja Blender top, locate any locking mechanisms or tabs present on your specific model. These may include twist locks or latch locks. Follow the instructions provided by Ninja for your particular blender model to lock it in place.
By taking these steps to properly close and secure your Ninja Blender lid, you can enjoy peace of mind knowing that your blending process will be seamless and worry-free. So go ahead, blend away with confidence!
Conclusion: Mastering the Art of Opening Your Ninja Blender Top for Hassle-Free Blending Experience
In conclusion, mastering the art of opening your Ninja Blender top is essential for a hassle-free blending experience. By following the simple steps outlined in this guide, you can ensure that you have a smooth and efficient blending process every time.
The keywords “Ninja Blender top” highlight the importance of understanding how to properly open and close the blender lid. This is crucial for avoiding any potential accidents or spills during the blending process.
By taking the time to familiarize yourself with your Ninja Blender’s design and features, you can confidently open and close the blender top without any difficulty. This will not only save you time and frustration but also help you achieve consistent and delicious results in your culinary creations.
So, whether you’re whipping up a refreshing smoothie or preparing a gourmet sauce, remember to master the art of opening your Ninja Blender top. Your hassle-free blending experience awaits!
As an Amazon Associate, I earn from qualifying purchases.