
As an Amazon Associate, I earn from qualifying purchases.
Properly cleaning your Ninja blender base is essential for maintaining its performance and ensuring that it continues to function at its best. Neglecting to clean the base of your blender can lead to a buildup of dirt, grime, and food residue, which can not only affect the overall performance of your appliance but also compromise its longevity.
Blender maintenance is often overlooked, but it plays a crucial role in keeping your kitchen appliances running smoothly. The blender base, in particular, is prone to collecting debris and spills from ingredients used during blending. Over time, this accumulation can hinder the blender’s functionality and even result in unpleasant odors or taste transfers between different recipes.
By regularly cleaning your Ninja blender base, you can prevent these issues from occurring and ensure that each blend is as efficient and effective as possible. Not only will this enhance the overall performance of your blender, but it will also prolong its lifespan, allowing you to enjoy delicious smoothies, soups, sauces, and more for years to come.
In this section, we will explore the importance of properly cleaning your Ninja blender base and provide you with practical tips on how to maintain its cleanliness effectively. So let’s dive in and discover how a clean blender base can make all the difference in achieving exceptional blending results!

Gather the Necessary Tools and Materials
To ensure the longevity and optimal performance of your Ninja blender, proper cleaning is essential. Gathering the necessary tools and materials will make this task quick and easy.
Firstly, you will need a few cleaning supplies. Dish soap is a must-have for effectively removing any residue or food particles from the blender base. It is recommended to use a mild dish soap to avoid damaging any components of the blender.
Next, warm water is crucial for creating a cleaning solution that will help break down stubborn stains or buildup on the blender base. Warm water also aids in sanitizing the blender, ensuring it is free from any bacteria or germs.
Lastly, a microfiber cloth is an excellent tool for gently wiping down the blender base without scratching or damaging its surface. The soft fibers of a microfiber cloth effectively trap dirt and grime, leaving your Ninja blender looking clean and shiny.
By gathering these essential tools and materials – dish soap, warm water, and a microfiber cloth – you are well-equipped to tackle the task of cleaning your Ninja blender base efficiently. With regular maintenance and proper care, your blender will continue to provide you with deliciously blended creations for years to come.
Unplug and Disassemble the Ninja Blender
When it comes to the safety of our kitchen appliances, it is crucial to follow proper procedures. Unplugging and disassembling a Ninja Blender requires careful attention to ensure a safe and efficient process.
The first step in this process is to always prioritize safety by unplugging the blender from the power source. This eliminates any risk of electrical shock or accidental activation while disassembling the appliance.
Next, when it comes to disassembly, it’s important to refer to the manufacturer’s instructions or user manual for specific guidance on your particular model. This will provide you with clear instructions on how to safely remove the blender parts without causing damage or injury.
During disassembly, take note of any locking mechanisms or release buttons that need to be engaged before attempting to remove any components. This will prevent any unnecessary force being applied and reduce the risk of breakage.
Carefully remove each part one at a time, ensuring that you have a firm grip and are using gentle pressure. Be mindful of any sharp edges or blades that may be exposed during this process and handle them with caution.
By following these steps, you can confidently unplug and disassemble your Ninja Blender while prioritizing safety every step of the way. Remember, always consult the manufacturer’s instructions for specific guidance and exercise caution throughout the process for a smooth and secure experience.
Remove Excess Food Residue and Spills
Maintaining a clean and tidy environment is essential, especially when it comes to removing excess food residue and spills. With a few simple steps, you can ensure that your surfaces stay spotless and free from any unsightly mess.
To begin, gently brush off any food debris using a soft brush or toothbrush. This will help remove any loose particles that may have accumulated on your countertops or tables. By doing so, you not only eliminate potential sources of contamination but also prevent the buildup of dirt and grime.
In the event of spills, quickly wipe them away with a damp cloth or sponge. Acting promptly ensures that the spill doesn’t seep into porous surfaces or leave behind stubborn stains. By using a damp cloth or sponge, you can effectively lift away the spill without causing damage to your furniture or appliances.
By incorporating these simple practices into your routine, you can effortlessly maintain a clean and hygienic space free from excess food residue and spills. So go ahead, take charge of cleanliness and enjoy an environment that is both visually appealing and safe for everyone.
Clean the Exterior of the Ninja Blender Base
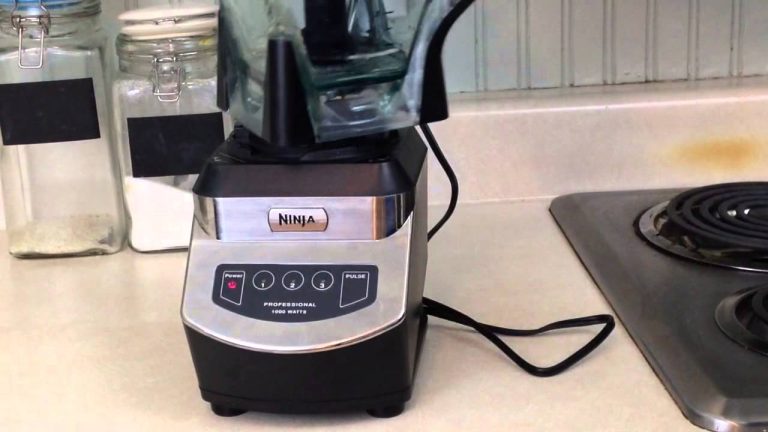
Keeping the exterior of your Ninja Blender base clean is not only important for maintaining its appearance but also for ensuring its longevity and optimal performance. By regularly cleaning and wiping down the surfaces, you can prevent the buildup of grime and debris that can accumulate over time.
To clean the exterior of your Ninja Blender base, start by unplugging it from the power source to ensure safety. Then, using a damp cloth or sponge, gently wipe down all surfaces of the base. For stubborn stains or dried-on residue, you can use a mild detergent or dish soap mixed with water to create a soapy solution. Apply this solution to a cloth and carefully scrub away any grime or debris.
Be sure to pay extra attention to areas where spills or splatters may have occurred, such as around buttons or on the bottom of the base. These areas are more prone to collecting dirt and food particles.
After cleaning, rinse off any soap residue with a clean, damp cloth, and then dry thoroughly with a soft towel. This will help prevent water spots or streaks from forming on the surface.
Clean the Interior of the Ninja Blender Base
Are you tired of struggling to clean the hard-to-reach areas inside your Ninja blender base? Look no further, as we introduce a game-changing solution that will make your cleaning routine a breeze. With our innovative techniques and tips, you’ll be able to effortlessly remove spills and residue from the interior of your blender’s base compartment. Say goodbye to the daunting task of disassembling and scrubbing every nook and cranny. Our methods will save you time and energy and ensure that your Ninja blender remains in pristine condition for years to come. Get ready to experience a hassle-free cleaning process like never before!
Reassemble and Test Your Cleaned Ninja Blender Base
Now that you have successfully cleaned your Ninja Blender base, it’s time to reassemble it and ensure that everything is working properly. Follow these steps to put your blender back together and test its functionality:
1. Start by placing the blender base on a clean and dry surface. Make sure all the components are within reach.
2. Take the pitcher or jar of the blender and align it with the base. Gently twist it clockwise until it locks into place securely.
3. Next, locate the blade assembly and carefully insert it into the pitcher or jar, ensuring that it fits snugly onto the shaft at the bottom.
4. Once you have assembled the blade assembly, place any additional attachments such as lids or caps onto the pitcher or jar if applicable.
5. Now that your Ninja Blender is reassembled, it’s time to test its functionality after cleaning. Plug in the power cord and switch on the blender.
6. Start by running a quick test with just water or a small amount of liquid to ensure that everything is functioning as expected. Gradually increase speed settings to check for any unusual noises or vibrations.
7. If your Ninja Blender operates smoothly without any issues, congratulations! You have successfully reassembled and tested your cleaned blender base.
Remember to always refer to your Ninja Blender’s instruction manual for specific guidelines on reassembly and testing procedures unique to your model.
Tips for Regular Maintenance and Cleaning to Extend Your Ninja Blender’s Lifespan
Taking proper care of your Ninja blender is essential to ensuring its longevity and optimal performance. Regular maintenance and cleaning are key factors in extending the lifespan of your blender. By following these simple tips, you can keep your Ninja blender in excellent condition for years to come.
First and foremost, always refer to the manufacturer’s care guide for specific instructions tailored to your Ninja blender model. This will provide valuable insights into any unique features or maintenance requirements that may apply.
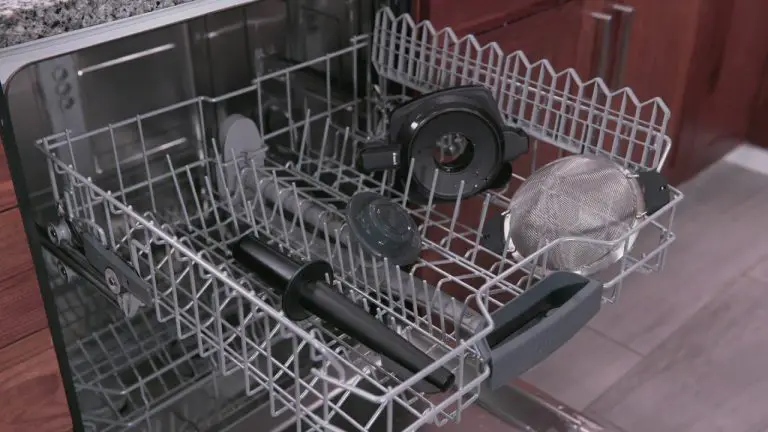
To start, it is crucial to clean your blender after each use. Begin by disassembling the removable parts, such as the pitcher, lid, and blades. These components can typically be safely washed by hand with warm, soapy water or placed in the dishwasher if recommended by the manufacturer.
Pay special attention to the blades, as they tend to accumulate residue over time. Use a soft brush or sponge to gently scrub away any food particles or buildup that may have accumulated on them. Be cautious while handling sharp blades, and consider wearing protective gloves if necessary.
In addition to regular cleaning, it is important to perform routine maintenance tasks such as inspecting the power cord for any signs of damage or wear. If you notice any fraying or exposed wires, it is crucial to replace the cord immediately for safety reasons.
Furthermore, check the base of your Ninja blender regularly for any debris that may have accumulated during use. Wipe it clean with a damp cloth, and ensure that no liquid has entered areas where electrical components are located.
Finally, store your Ninja blender properly when not in use. Make sure all parts are completely dry before reassembling and storing them in a clean and dry location. Avoid placing heavy objects on top of your blender, as this can cause damage.
By following these maintenance tips and adhering to proper cleaning practices, you can significantly extend the lifespan of your Ninja blender while ensuring safe and efficient blending every time you use it.
Conclusion: Enjoy Freshly Blended Delights with a Cleaned Ninja Blender Base
In conclusion, the Ninja Blender Base offers a convenient and efficient way to enjoy freshly blended delights. With its powerful motor and versatile functions, it ensures that your ingredients are thoroughly blended to perfection. The easy-to-clean design of the blender base makes it a hassle-free appliance to use and maintain.
Whether you’re whipping up smoothies, soups, or sauces, the Ninja Blender Base is a reliable companion in the kitchen. Its sleek and compact design also saves valuable countertop space. Say goodbye to clunky blenders that are difficult to clean and hello to a streamlined blending experience.
Investing in a Ninja Blender Base is not only a practical choice but also an investment in your culinary adventures. Experience the joy of creating delicious and nutritious blends with ease. Upgrade your kitchen today with the Ninja Blender Base and elevate your blending game to new heights.
As an Amazon Associate, I earn from qualifying purchases.


One Comment